SMBcrm Calendars now supports custom appointment statuses, so you can track stages such as Checked in, Awaiting documents, or Ready for appointment using your own labels. Enable Custom Appointment Statuses in Labs for your account to get started.
Custom labels with consistent scheduling behavior
Every custom status belongs to one of six built-in states. The state determines how scheduling behaves:
- Pending and Active: Hold the appointment’s time slot.
- Completed, No show, Cancelled, and Invalid: Free the time slot for new bookings.
Moving between statuses within the same state only changes the label. For example, moving from Confirmed to Checked in within the same state does not trigger notifications or connected-calendar updates.
Your existing Unconfirmed, Confirmed, Showed, No Show, Cancelled, and Invalid statuses carry over as defaults in their matching states. Existing appointments, workflows, and calendar settings continue working without changes.
Manage statuses and use them across appointments
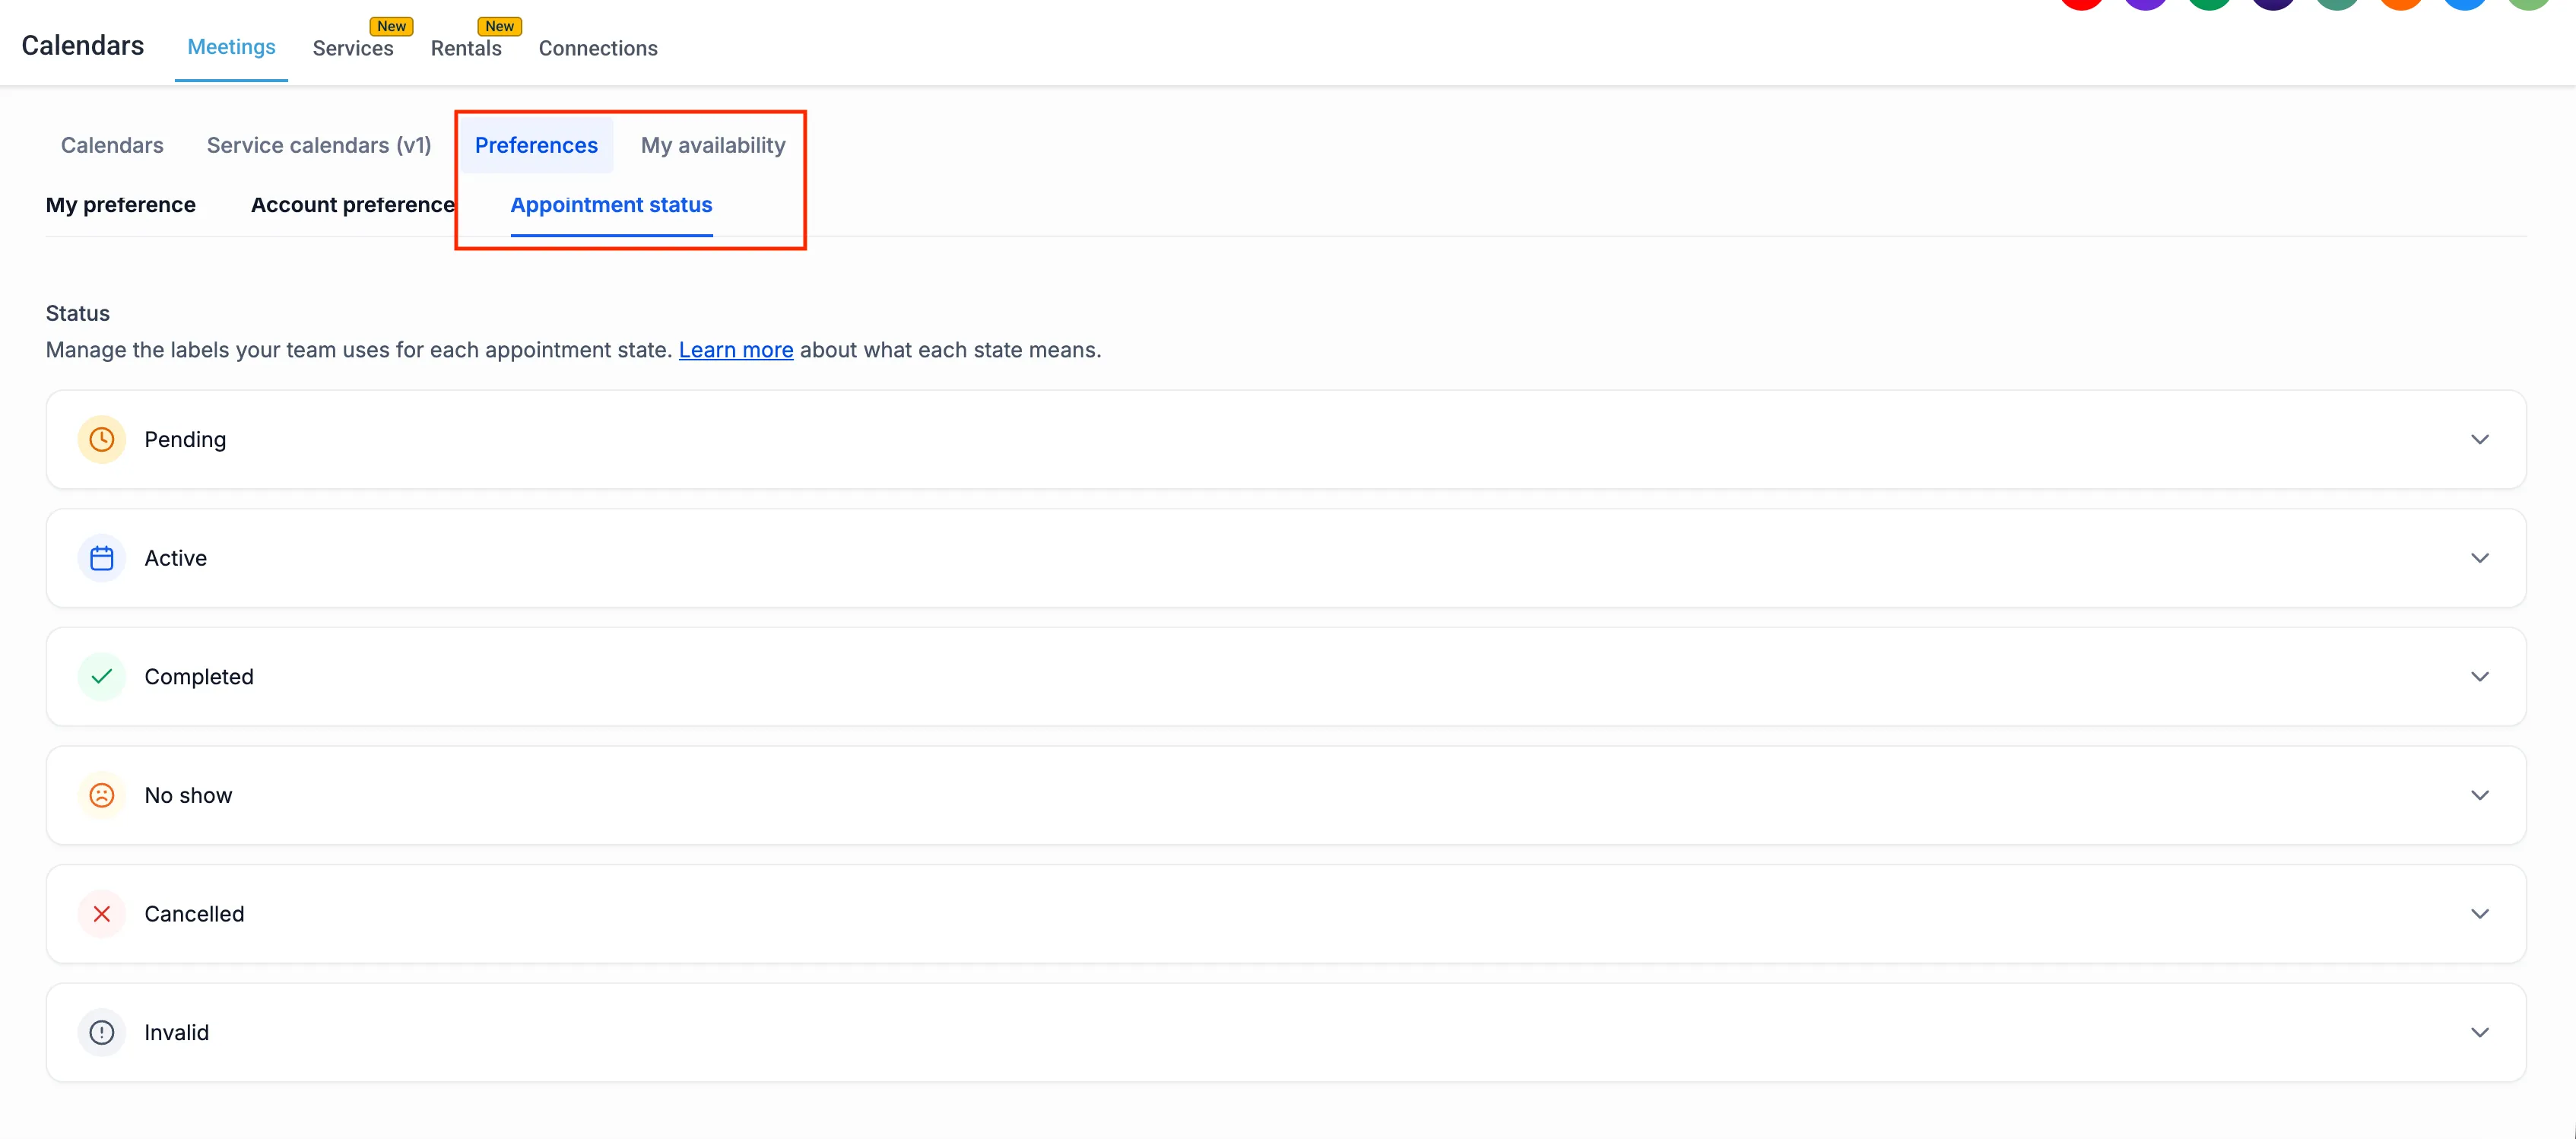
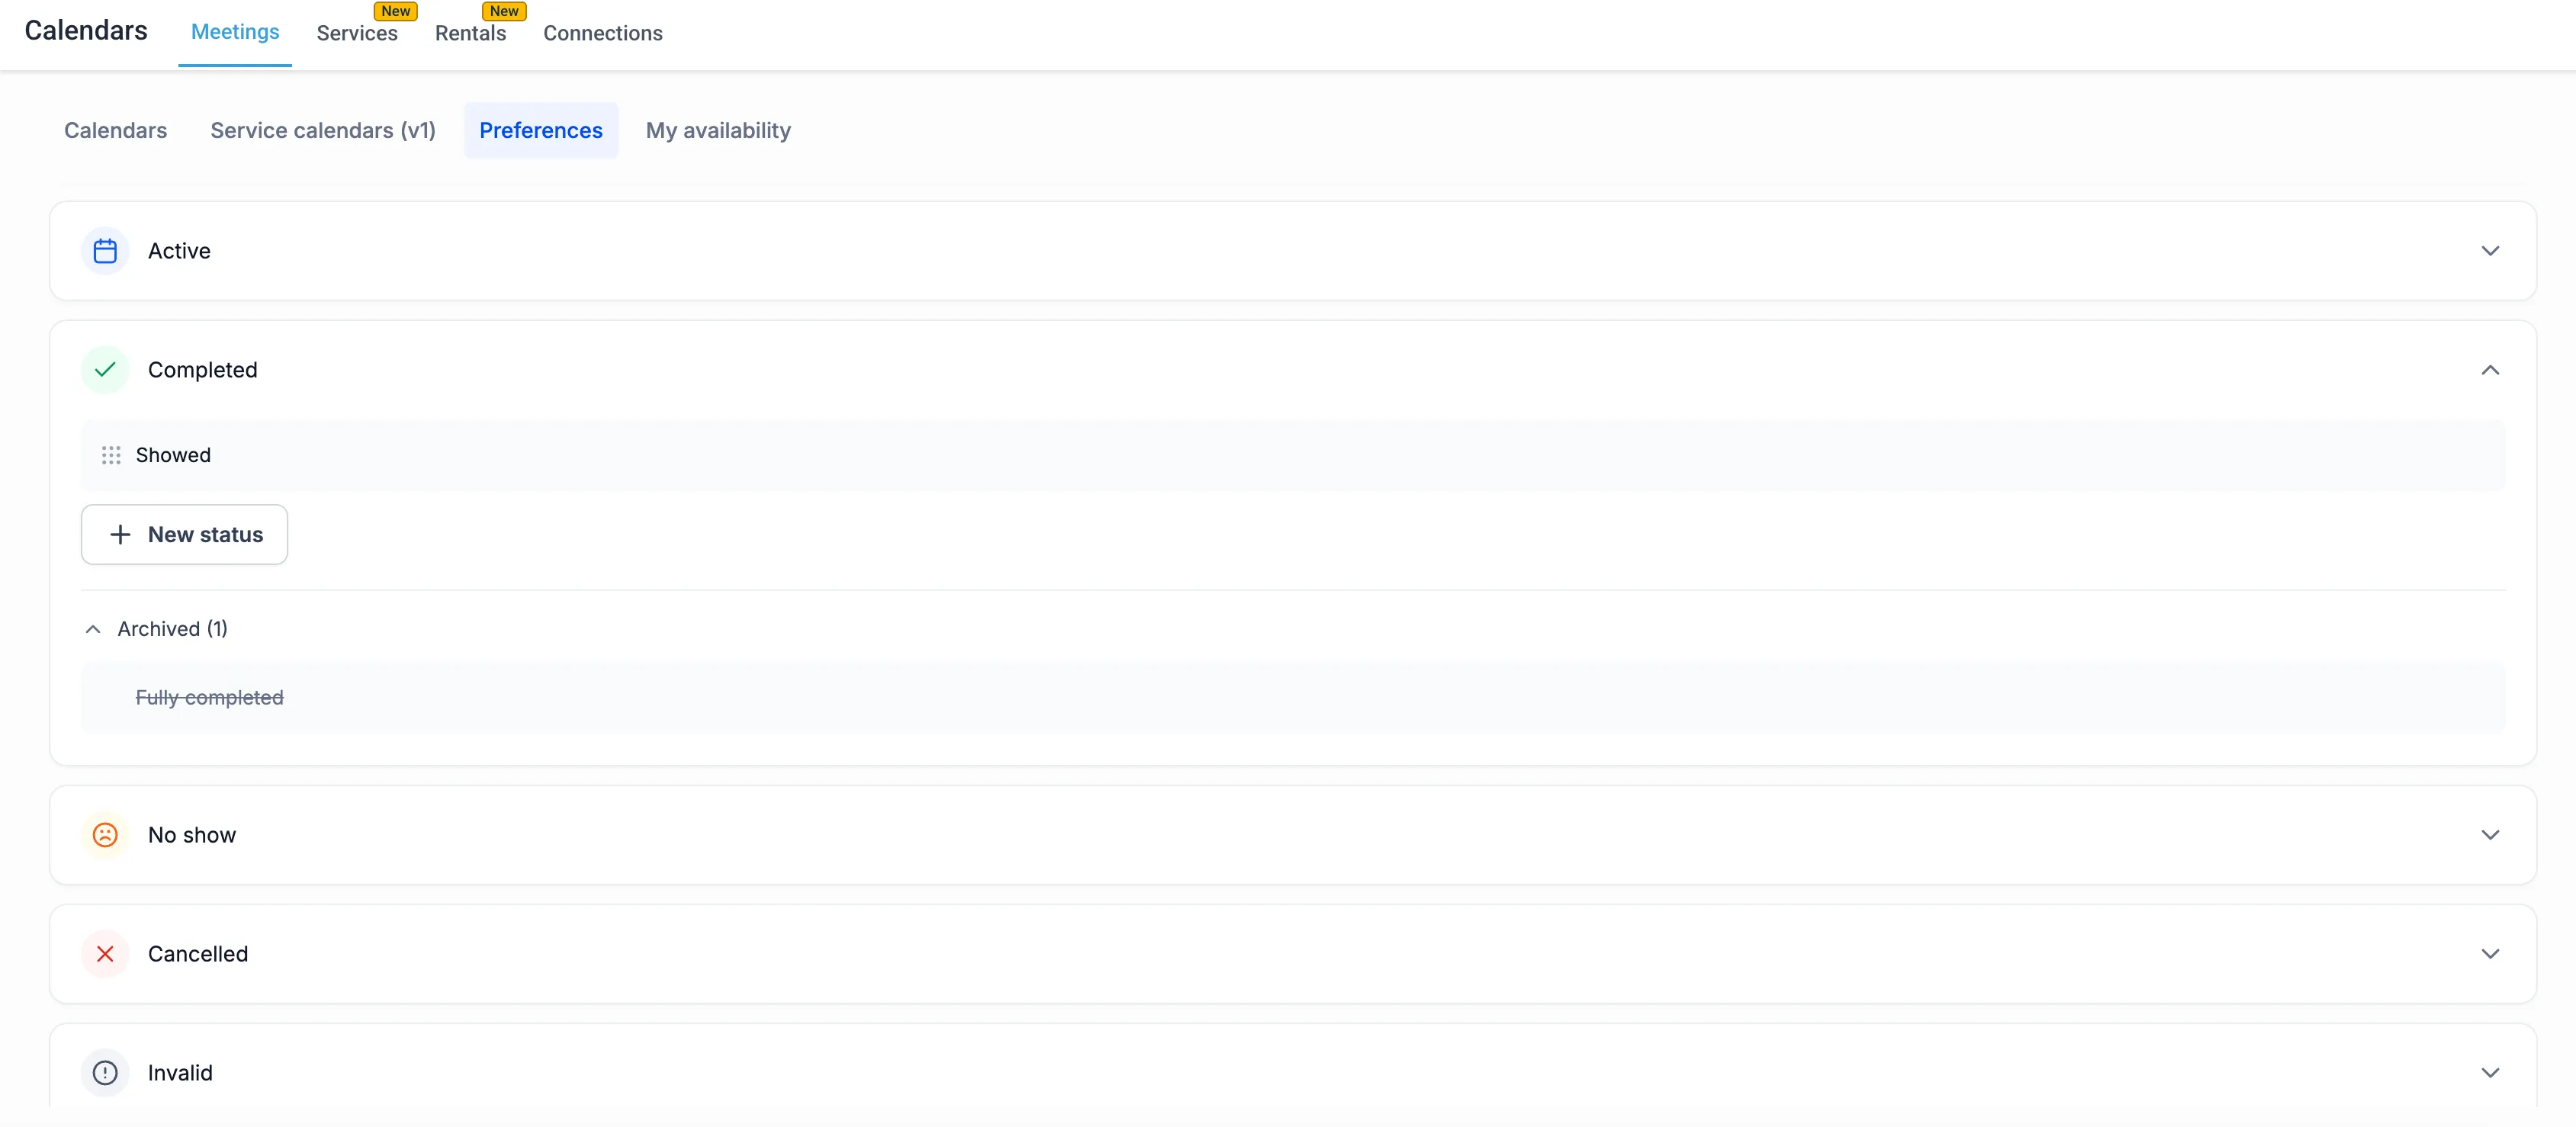
The Appointment status settings page lets you add, rename, reorder, archive, and restore statuses within each state.
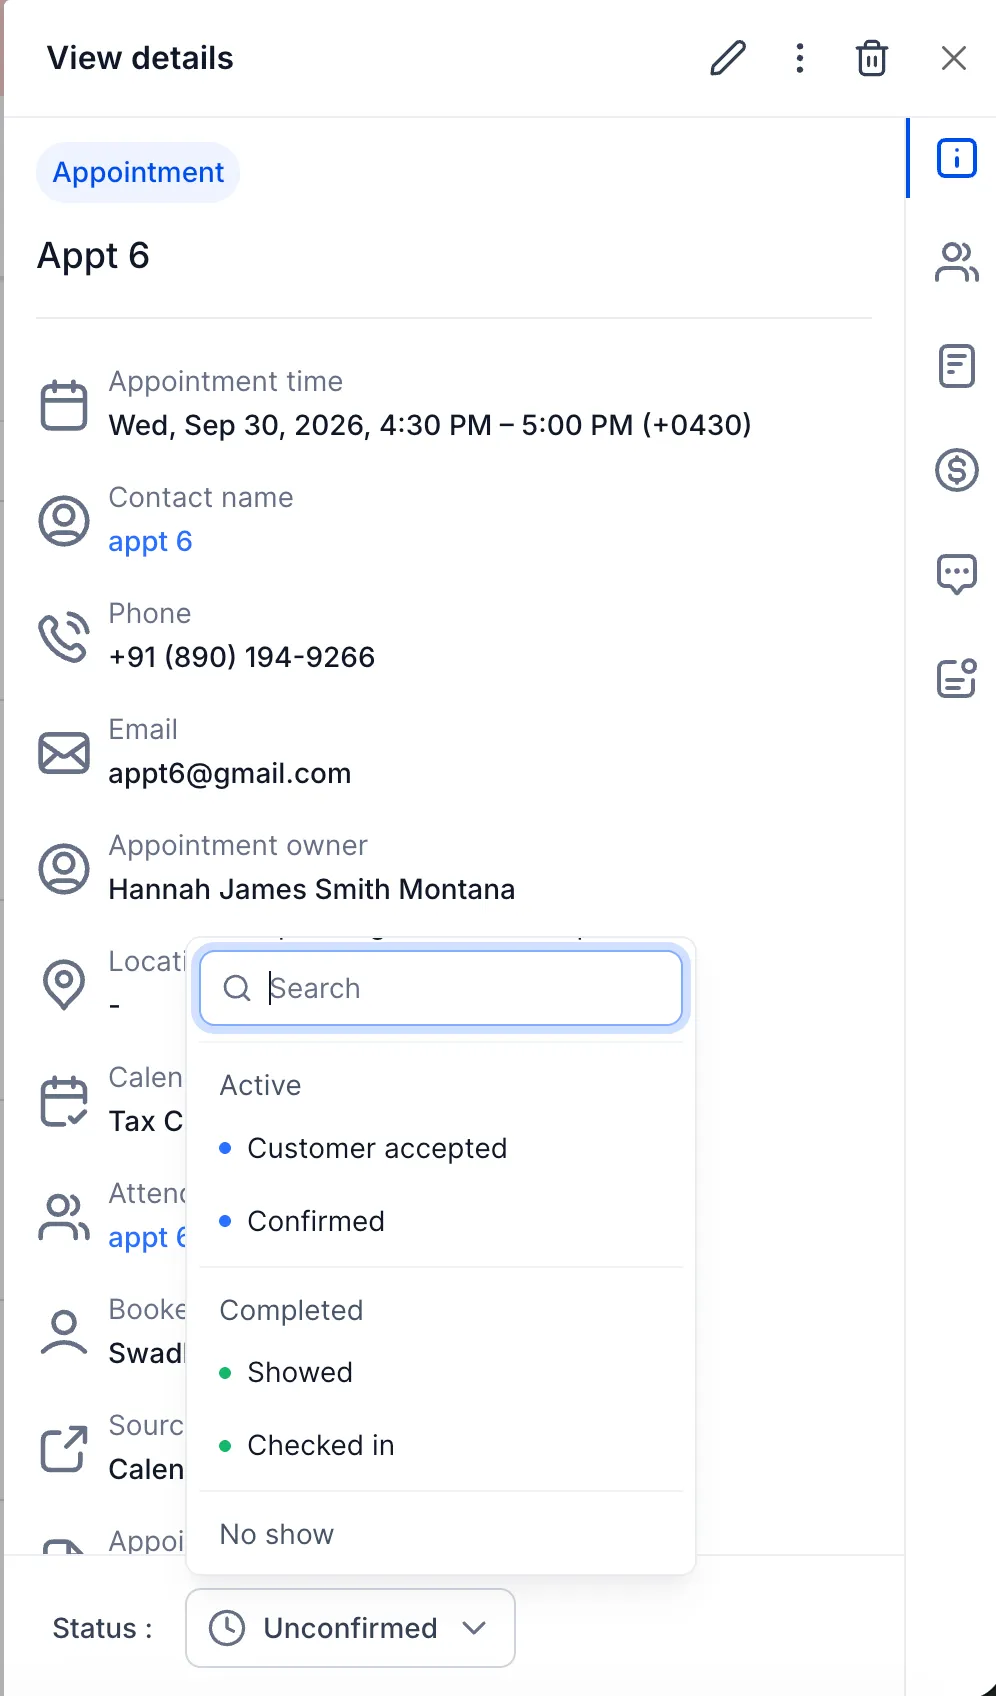
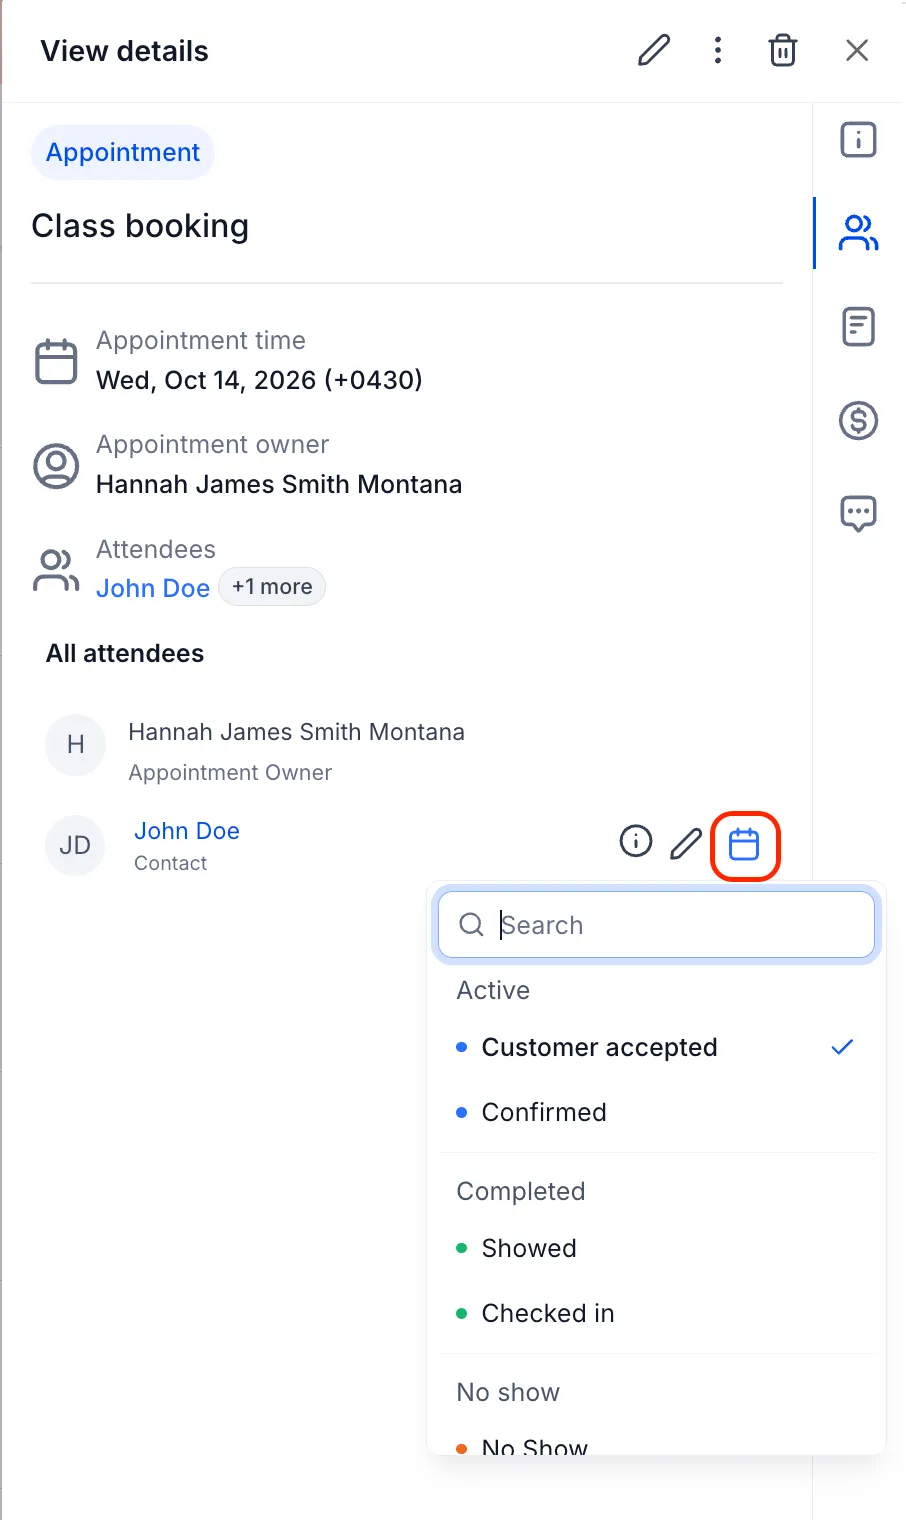
Custom statuses are available in the New appointment window, appointment details panel, and Appointment list view. Status pickers are searchable and grouped by state. For class booking calendars, you can also set a custom status for each individual attendee.
Archiving a status removes it from selection for new appointments, but existing appointments keep it. Before archiving, a confirmation explains the impact, including affected workflows that set appointments to that status. You can restore it from Archived at any time.
Automate around specific appointment stages
Workflow triggers, actions, and filters now include custom statuses. You can use a specific stage, such as Checked in, to trigger a follow-up message. Renaming a status automatically updates its name in workflows.
How to set up custom statuses
- Enable Custom Appointment Statuses in Labs for your account.
- Go to Calendars > Calendar Settings > Preferences > Appointment status.
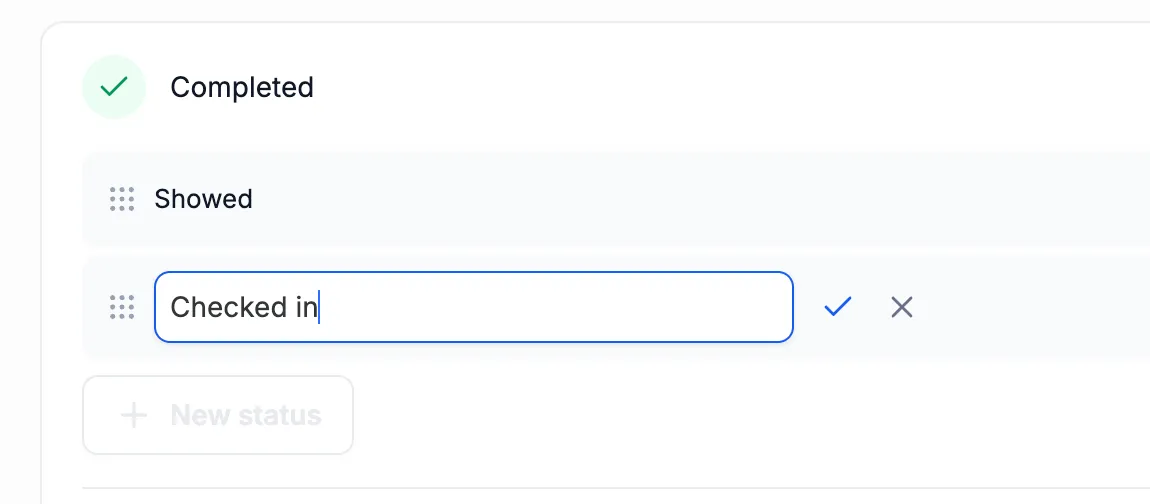
- Open a state, select New status, enter a name, and create it.
- Drag statuses to reorder them, or use the pencil icon to rename one.
- To archive a status, select its archive icon, review the impact, check the confirmation box, and select Archive.
- Apply your statuses when creating or managing appointments.
Release Images
Need Help Applying This Update?
Want help turning this update into a working part of your CRM, marketing, or automation setup?
Get Started or schedule a demo and we’ll help you map the right next step.